Bryant Air Conditioner Leaking Water – 5 Easy Solution
Water leakage is a common problem in Bryant air conditioners. Finding the cause and taking action is crucial to prevent air conditioner leaks and maintain efficiency. This guide will provide step-by-step instructions on how to address these issues.
By following these solutions, you can effectively resolve water leakage in your Bryant air conditioner and prevent further damage.
So let’s dive into the causes and solutions of water leakage in Bryant air conditioners to help you resolve this issue.
Reasons For Bryant Air Conditioner Leaking Water
Bryant air conditioners may experience water leakage due to various reasons.
These can include a frozen evaporator coil, an improperly designed or blocked condensate drain system, or a failure in the condensate pump. Addressing these issues promptly is crucial to prevent damage and ensure efficient cooling.
Below the solution for water leaks in Bryant air conditioners.

Clogged or Dirty Condensate Drain Line
A Common reason for a Bryant AC to leak water is a clogged or dirty condensate drain line. Over time, debris and mold can clog the drain line, disrupting drainage and causing unit leakage.
Understanding how to fix this issue can help prevent further problems and water damage.
How to Fix?
To address a clogged or dirty condensate drain line in a Bryant AC, follow these steps:
1. Turn off the air conditioner: Switch off the power to the unit from the circuit breaker to ensure safety while working on it.
2. Locate the condensate drain line: Typically, the drain line is a PVC pipe located near the indoor unit. It may run to a floor drain, sump pump, or an outside area.
3. Inspect and clean the drain line: Remove the drain line access cap or cleanout port. Use a wet/dry vacuum or a thin, long brush to remove any dirt or debris. You may also consider using a mixture of water and mild bleach to help kill any mold or bacterial growth. Be sure to read the manufacturer’s instructions before using any cleaning agent.
4. Check the drain pan: While the drain line is accessible, inspect the drain pan for any signs of damage or blockage. Clear any debris and ensure that the pan is properly positioned and securely in place.
5. Reassemble and test: Once the drain line and pan are clean, reattach the access cap or cleanout port securely. Restore power to the unit and observe if water leakage has stopped.
It’s important to note that if you are uncomfortable performing these steps or if the problem persists, it’s recommended to consult a professional HVAC technician for assistance.
Frozen Evaporator Coil
One of the reasons why a Bryant air conditioner may leak water is due to a frozen evaporator coil.
When the evaporator coil freezes, it can cause excessive condensation buildup leading to water leakage from the unit. Understanding how to fix this issue can help prevent further damage and ensure efficient cooling.
How to Fix?
To address a frozen evaporator coil in a Bryant air conditioner, follow these steps:
1. Turn off the air conditioner: Ensure the power to the unit is switched off from the circuit breaker to prevent any electrical hazards.
2. Allow the coil to thaw: Let the frozen evaporator coil thaw naturally. This process may take several hours to a day depending on the severity of the freezing.
3. Check the airflow: Inspect the air filters, return vents, and supply vents to ensure there are no obstructions or blockages hindering proper airflow. Clean or replace the air filters if necessary.
4. Verify refrigerant levels: Low refrigerant levels can contribute to a frozen coil. Contact a professional HVAC technician to check the refrigerant levels and address any leaks or recharge the system if needed.
5. Check the blower motor: A malfunctioning blower motor can also cause the evaporator coil to freeze. Have a professional inspect and service the motor to ensure proper operation.
6. Regular maintenance: Schedule regular maintenance with a professional HVAC technician to prevent future coil freezing. This includes cleaning the coil, checking for proper airflow, and inspecting the system for any potential issues.
Improperly Installed or Damaged Condensate Drain Pan
Another potential reason for water leakage in a Bryant AC is an improperly installed or damaged condensate drain pan.
The drain pan collects the condensation from the evaporator coil and channels it out of the unit. If the pan is not installed correctly or has cracks or damage, it can result in water leakage.
How to Fix?
To fix an improperly installed or damaged condensate drain pan on a Bryant AC, follow these steps:
1. Turn off the power: Safely shut off the power supply to the unit from the circuit breaker.
2. Locate the drain pan: The drain pan is typically located beneath the indoor unit. Remove any covers or panels necessary to access the pan.
3. Inspect the drain pan: Carefully examine the drain pan for cracks, holes, or signs of damage. If the pan is simply misaligned, adjust it to ensure it sits correctly beneath the evaporator coil.
4. Replace the drain pan if necessary: If the drain pan is severely damaged or cannot be repaired, it may need to be replaced. Consult the manufacturer’s guidelines or seek professional assistance to ensure the correct pan is selected and installed.
5. Reassemble and test: Once any repairs or replacements have been made, reattach any covers or panels. Restore power to the unit and monitor for any water leakage.
Improperly Designed or Blocked Condensate Drain System
Water leakage in a Bryant AC may result from an improperly designed or blocked condensate drain system.
Poorly designed or blocked drain systems can cause water backup and subsequent leakage. Addressing this issue is crucial for proper functioning and reducing the risk of water damage.
How to Fix?
To resolve an improperly designed or blocked condensate drain system in a Bryant air conditioner, follow these steps:
1. Turn off the power: Safely shut off the power supply to the air conditioner from the circuit breaker.
2. Locate the condensate drain line: Find the condensate drain line, typically a PVC pipe connected to the indoor unit. Trace the line to determine if it has any bends, kinks, or improper positioning that could impede proper drainage.
3. Clear any blockages: If the drain line is blocked, use a wet/dry vacuum or a thin, flexible brush to remove the obstruction. Exercise caution to avoid damaging the drain line or other components.
4. Check the condensate pump (if applicable): If your unit has a condensate pump, inspect it for proper operation. Clean or replace the pump if necessary.
5. Ensure proper slope and drainage: Ensure that the condensate drain line has a proper slope to facilitate water flow towards the designated drainage point. Adjust the line if needed, ensuring no low spots or bends that could impede drainage.
6. Test the system: After clearing any blockages and optimizing the drain system, restore power to the unit and observe its operation. Monitor for any signs of water leakage.
Condensate Pump Failure
Water leakage in a Bryant air conditioner may be caused by a condensate pump failure.
Some Bryant units are equipped with a condensate pump to remove water from the system. A malfunctioning or failed pump can lead to water backup and subsequent leakage.
It is important to address this issue promptly to prevent further damage and ensure efficient operation..
How to Fix?
To address a condensate pump failure in a Bryant air conditioner, follow these steps:
1. Turn off the power: Switch off the power supply to the unit from the circuit breaker for safety.
2. Locate the condensate pump: Identify the condensate pump, usually located near the indoor unit or in the vicinity of the drainage system.
3. Inspect the pump: Check the pump for any visible damage, loose connections, or signs of malfunction. Listen for any unusual noises or vibrations when the pump should be operational.
4. Clear any blockages: If the pump has clogged drain lines or other obstructions, clear them using a small brush or compressed air. Ensure that all components are free from debris and functioning properly.
5. Test the pump: Restore power to the unit and test the condensate pump to verify its functionality. Observe if the pump starts running and removes water from the system as intended.
6. Replace the pump if necessary: If the condensate pump is damaged beyond repair or fails to operate correctly, it may need to be replaced. Consult the manufacturer’s guidelines or seek professional assistance to ensure the correct pump selection and installation.

How Do You Clean A Bryant Air Conditioner?
Regularly cleaning your Bryant air conditioner is key to its performance and longevity.
Here are the steps to clean your Bryant air conditioner:
Remove Debris:
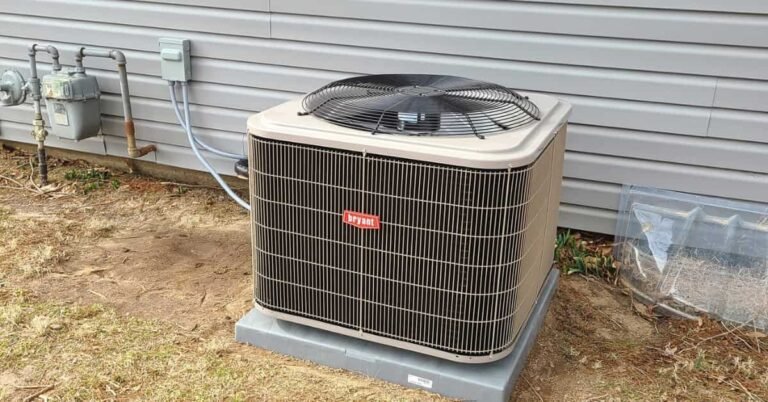
- Inspect the outdoor unit and remove any debris, such as leaves, twigs, or dirt, from the top and sides.
- Use a soft brush or vacuum cleaner to gently clean the grill and fins, avoiding any damage to the delicate components.
- Unscrew the top panel of the unit and carefully lift it off to access the interior.
Clean The Fins:
- With a soft brush or fin comb, gently clean the aluminum fins. Be cautious to avoid bending or damaging them.
- Remove any stubborn dirt or debris using a mild detergent mixed with water. Dip a soft cloth or sponge into the solution and wipe the fins gently.
- Rinse the fins with a hose, starting from the top and working your way down. Avoid using excessive water pressure that could damage the fins.
Clear The Condensate Drain:
- Locate the condensate drain pipe, usually attached to the indoor unit, and remove the cap or plug.
- Use a handheld vacuum to clear any debris or buildup from the drain pipe.
- Flush the condensate drain with a mixture of equal parts water and vinegar to prevent mold or algae growth.
Clean The Air Filters:
- Turn off the air conditioner and locate the air filters, which are usually located near the indoor unit.
- Remove the filters and inspect them for dirt, dust, or debris.
- Wash the filters with mild soap and lukewarm water, then gently shake off excess water. Let them air dry completely before reinstalling.
Reassemble And Test:
- Once the components are clean and dry, reassemble the air conditioner by replacing the top panel, cap, or plug.
- Restore power to the air conditioner and test its functionality by adjusting the settings and verifying that cool air is being circulated effectively.
Regularly cleaning your Bryant AC maintains performance and efficiency for a comfortable, healthy indoor environment. By following these simple steps, you can prolong the life of your air conditioner and enjoy optimal cooling.
Conclusion
Prevent damage and maintain optimal performance of your Bryant air conditioner by addressing water leakage. Ident and resolve the underlying causes, like a frozen evaporator coil or clogged condensate drain, to effectively eliminate the problem.
Thawing the frozen coil, clearing drain blockages, and inspecting/replacing the condensate pump can restore proper functioning to your air conditioner. Regular maintenance and periodic checks can also prevent future water leakage issues.
By following these guidelines, you can enjoy a leak-free and efficiently cooling home environment with your Bryant air conditioner.


