How To Clean Rheem Air Conditioner? Quick & Easy Guide
To clean a Rheem air conditioner, switch off the power and clean the exterior, filters, coils, and drain line. Regular maintenance includes gentle brushing and vacuuming of accessible components.
Maintaining your Rheem air conditioner is crucial for optimal performance and longevity. Over time, dust and debris accumulate within your AC unit, leading to reduced efficiency and potential system malfunctions. Taking the time to clean your AC not only enhances the air quality in your home but also ensures that your unit operates at peak efficiency.
This process involves a few straightforward steps that homeowners can routinely carry out. Before performing any maintenance, remember to always disconnect power to ensure your safety.

1. Preparing For Cleaning
Before we jump into the nitty-gritty of the cleaning process, we must prepare properly. Pre-cleaning prep ensures a smooth, safe, and effective way to maintain your unit in tip-top shape. Let’s gather the tools and materials first.
Gathering Necessary Tools And Materials
Collecting the right tools and materials is the first step. You will need:
- Screwdriver: To open the access panels.
- Garden hose: For rinsing the unit.
- Fin comb: For straightening any bent fins.
- Cleaning solution: A mild detergent works great.
- Soft-bristle brush: For gentle scrubbing.
- Cloth: For drying and wiping down surfaces.
- Bucket: To mix the cleaning solution.
- Gloves: To protect your hands.
Turning Off The Power
Safety comes first. Take these steps to turn off the power:
- Locate your AC unit’s circuit breaker.
- Switch it to the OFF position.
- Double-check that the power is off.
After the power is off, you can safely begin cleaning. Taking these preparatory steps seriously prevents accidents and ensures a safe cleaning environment.
2. Cleaning The Exterior
Keeping your Rheem air conditioner clean is crucial for efficient operation. The exterior unit is exposed to the elements, collecting dirt and debris over time. Regular cleaning can prevent airflow blockage and maintain system efficiency.
Removing Debris And Dirt
Start with the basics:
- Power off your air conditioner.
- Remove any large debris by hand.
- Use a garden hose with gentle water pressure to rinse the fins.
- Avoid using high-pressure water to prevent fin damage.
Wiping Down The Surfaces
After removing loose dirt:
- Prepare a soap solution with mild detergent.
- Dip a soft cloth in the solution and wring out excess water.
- Gently wipe the exterior surfaces, focusing on removing stuck-on dirt.
- Rinse with clean water and dry using a soft, lint-free cloth.

3. Cleaning The Air Filters
A clean air filter is key to a well-functioning Rheem air conditioner. Regular cleaning ensures efficient operation and healthy air quality. Dust and debris can hinder performance.
Follow these steps to clean your Rheem air filters.
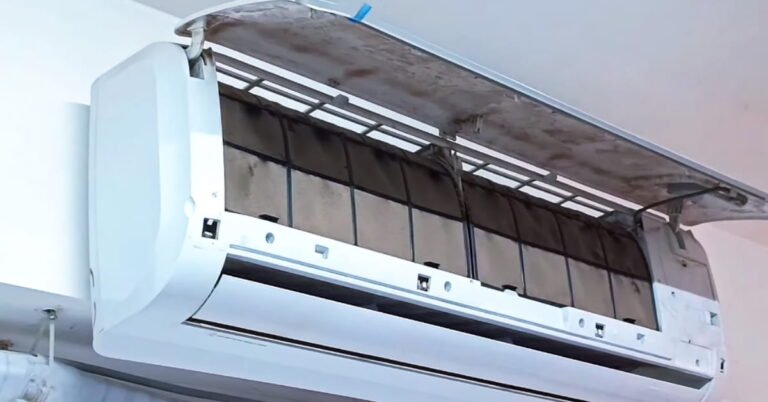
Locating And Removing The Filters
Filters are usually at the front of the unit. Remove the front panel to access them. Some models have a simple latch system. For others, a screwdriver might be necessary.
After opening the panel, you’ll see the filters. Slide or pop them out carefully. Handle filters gently to avoid damage.
Cleaning The Filters
Next, assess the dirt level. Light dusting needs only simple brushing. Heavier build-up calls for a wash.
- Use a soft brush to remove loose dust.
- For a deeper clean, rinse them with warm water.
- Mild detergent can help with stubborn grime.
- Avoid harsh chemicals as they may damage the filters.
- Rinse thoroughly to ensure no soap remains.
Allow the filters to dry completely before reinstalling. This prevents mold growth. Reinsert the filters once dry. Ensure they fit perfectly to avoid bypassing dust.
Regular maintenance every 30-60 days is beneficial. This can extend your unit’s life span. Plus, it can save money on energy bills.
4. Cleaning The Condenser Coils
Cleaning the condenser coils is a key step in maintaining your Rheem air conditioner. Dirty coils can reduce efficiency and strain your system, leading to higher energy bills and possible breakdowns.
Follow these straightforward steps to clean the condenser coils like a pro.
Locating The Condenser Coils
The condenser coils are usually found in the outdoor unit of your Rheem air conditioner. Remove the service panel to access the coils. They resemble a series of thin metal fins surrounding the unit.
Spraying The Coils With Cleaning Solution
Once located, use a commercial air conditioner coil cleaner or mix a mild dishwashing detergent with warm water. Spray the solution directly onto the coils. Apply generously to cover all areas but avoid saturating any electrical components.
- Turn off the unit’s power supply.
- Mix the cleaning solution.
- Cover electrical controls with a plastic bag.
- Spray solution onto the coils.
Wait for the cleaner to soak in and loosen the dirt. Rinse the coils gently with a hose. Dry the area completely before restoring power.

5. Cleaning The Evaporator Coils
The evaporator coils, located inside the indoor air handling unit, are essential for efficient cooling. Dirt and debris can insulate these coils and reduce their effectiveness. Regular cleaning ensures proper heat absorption and maintains your AC’s efficiency. Let’s guide you through the process of cleaning the evaporator coils.
Accessing The Access Panel
To clean the coils, first gain access to them:
- Power off the air conditioner for safety.
- Find the access panel, usually located on the side of the indoor unit.
- Remove the panel screws or fasteners using a screwdriver.
- Gently lift away the panel to expose the coils.
Cleaning The Coils With A Brush
Once the panel is open, it’s time to clean:
- Use a soft brush to gently remove dust from the coil fins.
- Brush in the direction of the fins, being careful not to bend them.
- Remove all visible debris to ensure maximum airflow.
6. Cleaning The Drainage System
Cleaning the Drainage System is vital for your Rheem air conditioner’s health and efficiency. Over time, mold, algae, and debris can clog the system. A clean drainage ensures your unit runs smoothly and prevents water leaks.
Checking And Clearing The Condensate Drain Line
To start:
- Locate the PVC pipe near the outdoor unit, known as the condensate drain line.
- Inspect for any blockages or visible dirt that could cause backups.
- Use a wet-dry vacuum to suction out clogs from the drain line end.
- Flush the line with distilled vinegar to kill mold or algae.
- After an hour, rinse with water to clear out the vinegar and loosened debris.
Cleaning The Condensate Drain Pan
After clearing the line:
- Turn off your Rheem AC to begin cleaning safely.
- Find the drain pan, usually located underneath the indoor air handler.
- Remove any standing water with a sponge or towel.
- Clean the pan with a mixture of soap and hot water or bleach solution.
- Rinse the pan thoroughly to remove any soap residue.
- Check the pan for damage or rust that might need repair or replacement.

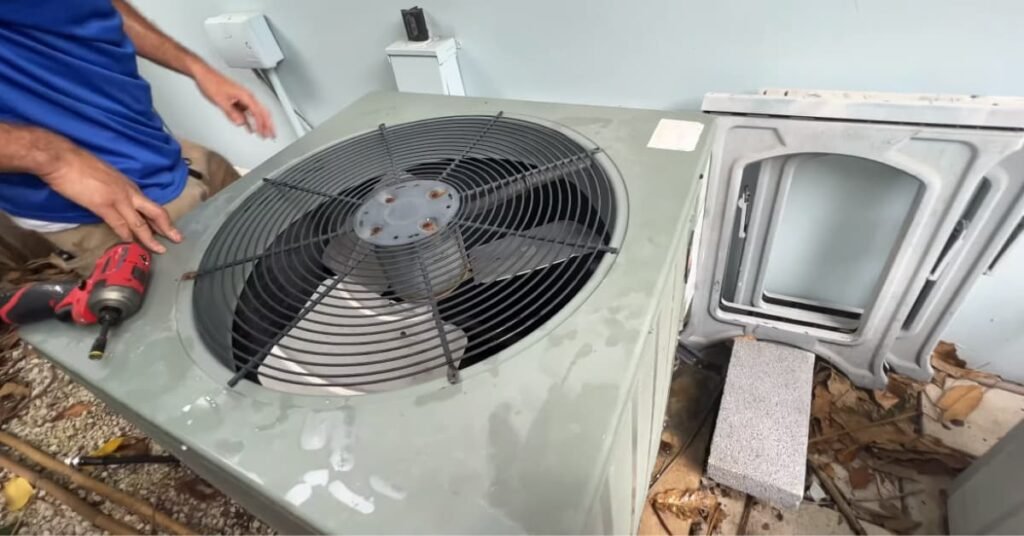
7. Cleaning The Fan Blades
Maintaining your Rheem AC is key to ensuring it runs efficiently. A crucial part of this is cleaning the fan blades. Over time, the blades can gather dust and debris, which can affect your unit’s performance.
Let’s take a closer look at how to give them a good clean.
Removing The Fan Cover
Before we start with the actual cleaning, we need to access the fan blades. Here’s how to remove the fan cover safely:
- Turn off your AC unit to prevent any electrical hazards.
- Locate the screws or clips that hold the cover in place.
- Use a screwdriver to gently remove these fasteners.
- Lift the cover carefully to avoid damaging any wires or components.
With the fan blades exposed, it’s time to get them shining. Follow these steps for effective cleaning:
- Use a soft brush or cloth to loosen the accumulated dust.
- Wipe each blade with a damp cloth. Avoid getting motor parts wet.
- For stubborn grime, use a mild detergent with warm water.
- Dry the blades thoroughly with a clean, dry cloth.
With these steps, your Rheem AC fan blades will be clean, helping your unit to operate at its best.
8. Reassembling And Testing
Now that your Rheem air conditioner is clean, it’s time to put it back together. The reassembly and testing stages are crucial for ensuring everything runs smoothly.
Follow these steps carefully to enjoy cool, refreshing air once again.
Putting Everything Back Together
Reassembling your unit is straightforward if you’ve kept track of the parts. Here’s how to do it:
- Replace the air filters or reinsert the cleaned ones.
- Slide the fan unit back into place, making sure it fits securely.
- Reconnect any electrical connectors that were detached.
- Secure the cover with screws or latches.
Turning The Power Back On And Testing The Unit
With the air conditioner reassembled, it’s time to test:
- Turn the power back on at the breaker and thermostat.
- Set a mild temperature, and allow the unit to start.
- Listen for unusual noises, indicating a problem.
- Check the airflow from the vents for coolness.
Note: If your unit doesn’t operate correctly, consult a professional technician.
Conclusion
Maintaining your Rheem air conditioner is crucial for optimal performance. Regular cleaning ensures efficiency and extends its lifespan. Embrace these straightforward steps for a dust-free, functional unit. By prioritizing your Rheem’s care, you’ll enjoy sustained comfort and air quality in your space.
Remember, a little effort goes a long way for your home’s climate control.


