How to Clean Haier Air Conditioner? Quick & Easy Guide
To clean a Haier air conditioner, start by turning it off and unplugging it. Remove and wash the filter and coils, then clean the AC interior and exterior with a soft cloth.
Maintaining a Haier air conditioner involves routine cleanings to ensure its efficiency and longevity. Regular upkeep not only optimizes performance but also maintains air quality by preventing the accumulation of dust and allergens. Neglecting this task can lead to diminished cooling capacity and higher electricity bills.
Taking on the responsibility of keeping your Haier air conditioner clean can seem daunting at first, but with the right approach, it becomes a simple part of your household routine. Follow the step by step guide below to clean your Haier AC.
1. Preparation for Cleaning
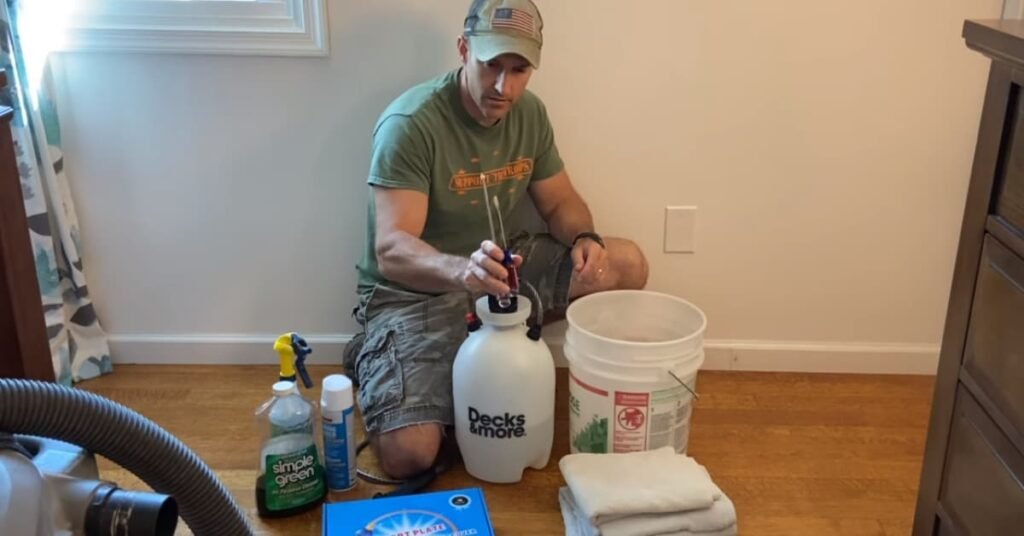
Before diving into cleaning your Haier Air Conditioner, proper preparation is key. It ensures a safe and efficient cleaning process. Let’s start by gathering what you’ll need and understanding the safety measures to keep in mind.
Gathering Necessary Supplies
Equip yourself with the right tools and products for a smooth cleaning operation. Here’s a list to help you prepare:
- Screwdriver – To open the unit’s cover.
- Gloves – To protect your hands during cleaning.
- Soft brush or vacuum cleaner – For dust removal.
- Cleaning agent – Prefer non-abrasive, air conditioner-friendly cleaners.
- Cloth – A soft cloth is best for wiping surfaces.
- Bucket and water – For mixing the cleaning solution and rinsing.
Safety Precautions
Ensuring your wellbeing is crucial during this cleaning process. Heed these safety tips:
- Power off the air conditioner from the main switch and unplug it.
- Wear protective gloves and eyewear to avoid any injury.
- Ensure the area is well-ventilated to prevent the inhalation of cleaning agents.
- Do not mix cleaning agents unless specified; it can be dangerous.
- Keep children and pets away from the cleaning area.
2. Cleaning The Exterior
Cleanliness ensures your Haier air conditioner runs efficiently. The exterior, though not directly involved in cooling, needs attention too. Dirt build-up can affect performance. Regular cleaning maintains the unit’s aesthetics and functionality.
Turning Off The Unit
Start by powering down your air conditioner. Safety is a priority. Ensure your unit is off before you begin. This prevents accidents and protects the system’s components. Unplug it from the power source for complete safety.
Wiping Down The Exterior
Use a soft, damp cloth to clean the surface. Gently wipe to remove dust and debris. Avoid harsh chemicals. They can damage the exterior. Focus on removing visible dirt from the sides and top. Perform this routine bi-weekly for the best results.
- Unplug the AC to ensure no power flows.
- Soft cloth should be slightly wet for cleaning.
- Avoid spraying water directly on the unit.
- Do not use abrasive tools or harsh detergents.
3. Cleaning The Filters
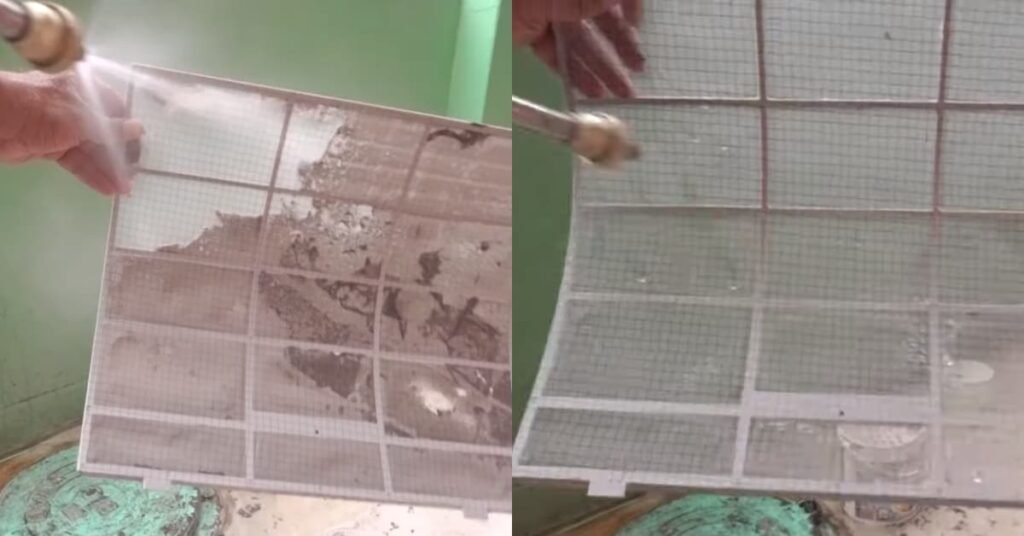
Cleaning your Haier Air Conditioner’s filters is crucial for performance. Dust and grime can reduce air flow. Clean filters mean better air quality. Regular maintenance extends your AC’s life.
Here’s a step-by-step guide to refreshing your unit’s breath.
Locating The Filters
Remove the front panel of your air conditioner. Look for the filter compartment. Most Haier models house filters right behind the front cover. If unsure, refer to your user manual. It shows exact filter locations for your specific model.
Rinsing Or Vacuuming The Filters
Rinsing: Gently remove the filters. Use a soft brush to clear loose dust. Run lukewarm water over the filters. Do not use harsh chemicals. Allow the filters to air dry completely before reinstalling.
Vacuuming: If vacuuming, use a soft brush attachment. Carefully vacuum each side of the filters. Ensure no damage to the filter mesh. Vacuuming is quick and effective for light cleaning.
Important: Whether rinsing or vacuuming, never reinstall damp filters. Moist filters can lead to mold and mildew. Always ensure they’re completely dry. After cleaning, place the filters back into the compartment. Secure the front panel. Reactivate your AC for fresher, cleaner air.
4. Cleaning The Coils
Cleaning the coils on your Haier air conditioner is a vital step to ensure effectiveness and efficiency. Dust and debris can hinder performance.
Let’s dive into the step-by-step process of keeping your coils in top-notch condition.
Accessing The Coils
Start by removing the front panel of your unit. This typically involves unscrewing or unclipping the panel. Locate the coils. They’re the serpent-like components behind the filter. Now you have clear access to start the cleaning process.
Using A Soft Brush To Clean The Coils
A soft brush is your go-to tool for this job. Gently brush along the coils. Avoid pressing hard. The coils are sensitive and can bend easily. Move the brush in the direction of the fins. This will remove the dust without damaging the parts.
Finish by using a coil cleaner. Spray it evenly across the coils. Follow the instructions on the cleaner for the best results. After applying the cleaner, give it some time to work its magic. Then, rinse with water if directed. Ensure all components are completely dry before reassembling.

5. Cleaning The Drainage System
Maintaining a clean drainage system in your Haier air conditioner ensures optimal performance and prevents water damage. Regular cleaning avoids unpleasant odors and mold growth.
Learn how to effectively clean the drainage system below.
Checking For Blockages
Remove the access panel to inspect the drain pan. Check for debris that could clog the drain. Look inside the drain hose. If there’s a blockage, gently use a wire to clear it. Flush the line with clean water to confirm it’s clear.
Using A Mixture To Clean The Drain
After checking for blockages, it’s cleaning time. Prepare a mixture of one part bleach to one part water. This helps kill mold or mildew.
Pour the solution into the drainage pipe. Let it sit for 30 minutes. This breaks down any remaining debris.
Finally, flush the drain with clean water. Ensure water flows freely. If the water backs up, repeat the process. Regular cleaning maintains your unit’s efficiency and prevents leaks.
6. Reassembling And Testing
Congratulations! You’ve cleaned your Haier air conditioner thoroughly. Now it’s time to put it all back together and ensure it runs smoothly.
Follow these steps to reassemble your unit and test it properly.
Putting Everything Back Together
- Replace the air filters by sliding them back into their original positions.
- Reattach the front panel by aligning it correctly and snapping it into place.
- Secure any screws or fasteners that were removed during disassembly.
- Ensure all parts are firmly attached and nothing is loose.
Reassembly is a careful process. Double-check every component, especially the filters, to ensure optimal air quality and efficient operation. Feel the satisfaction of a job well done as each part clicks back into place, signaling your air conditioner is almost ready for action.
Testing The Unit
- Plug in your Haier air conditioner and turn it on.
- Listen for unusual noises that might indicate a problem.
- Monitor the air flow from the vents for consistency.
- Check the temperature of the air to confirm cooling effectiveness.
Testing is key to ensuring your air conditioner works as expected. Pay close attention to its performance. If something seems off, double-check your assembly or consult the manual. Knowing your unit is back in top shape provides peace of mind for the warm days ahead.
Maintenance Tips
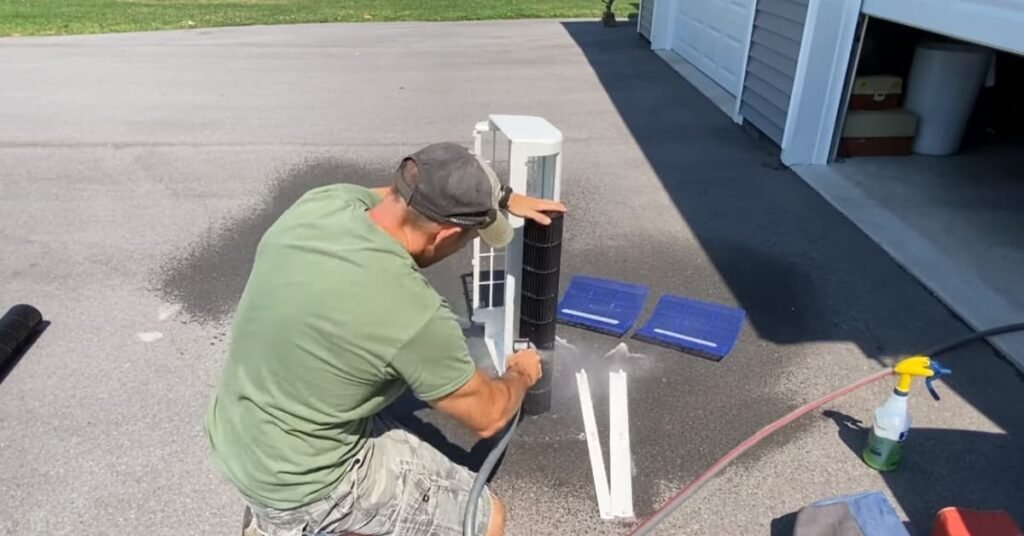
Keeping your Haier air conditioner in top shape requires regular care. Stay cool and comfortable by following straightforward maintenance routines. Ensure its efficiency and longevity with these tips.
Regular Maintenance Schedule
Create a consistent cleaning plan for your air conditioner. Dust and dirt build-up can lead to inefficiencies.
Monthly, be sure to:
- Clean the air filters to improve airflow.
- Wipe down the exterior with a damp cloth.
- Check the coils and fins for any debris.
Each season, tackle a deeper clean:
- Inspect the drain channel for blockages.
- Vacuum internal components carefully.
- Ensure the system is airtight with no leaks.
Professional Servicing
Besides your own upkeep efforts, an expert eye is crucial. Aim for HVAC professional servicing at least once a year.
Technicians will handle tasks such as:
| Professional Task | Benefits |
| Checking refrigerant levels | Optimizes cooling efficiency |
| Inspecting electrical components | Prevents potential hazards |
| Cleaning ducts and vents | Ensures unpolluted air flow |
Your Haier system’s lifespan will significantly increase with these steps. A well-maintained unit also keeps energy costs down.
Conclusion
Maintaining your Haier air conditioner is vital for optimal performance. Regular cleaning prevents dust buildup and ensures efficiency. By following the steps outlined in this guide, you can extend the lifespan of your unit and enjoy clean, cool air. Remember to schedule routine maintenance to keep your air conditioner running smoothly.
Happy cleaning!

