Why Isn’t My Air Conditioner Turning On? (9 Solution)
If you’re having trouble with your air conditioner not turning on, exploring the possible causes is essential. By understanding these potential issues, you can take the necessary steps to address them.
There can be various reasons why your AC unit is not working properly, from simple issues that you can fix yourself to more complex problems that require professional help.
Let’s explore common reasons why an air conditioner may not turn on and provide solutions to get your cooling system up and running again.

Why isn’t my air conditioner turning on?
There can be several reasons why your air conditioner is not turning on. Some of the common causes include electrical issues, thermostat problems, refrigerant leaks, overload protection triggers, and faulty compressors.
Below discussed each of these potential issues and provided solutions to help you troubleshoot your AC unit.
1. Power supply issues
When your air conditioner fails to turn on, power supply issues might be the culprit. Several factors can cause this problem, such as a tripped circuit breaker, a blown fuse, or a disconnected power source.
Understanding and addressing these power supply issues can help you restore functionality to your AC and ensure a cool and comfortable environment.
Solution:
1. Check the circuit breaker: Locate the electrical panel and check if the circuit breaker connected to your air conditioner is tripped. If it is, flip the breaker switch off and then back on to reset it.
2. Inspect the fuses: If your air conditioner uses fuses, ensure none of them are blown. Replace any blown fuses with new ones of the same rating.
3. Verify the power source: Confirm that the air conditioner is properly connected to a power source. Check the power cord and ensure it is securely plugged into an outlet or the designated power supply.
4. Test the outlet: If the air conditioner is connected to a wall outlet, try plugging in a different device to verify if the outlet is functioning correctly. If not, consult an electrician to fix the outlet.
5. Call a professional: If the power supply issues persist or if you are uncomfortable working with electrical components, it is recommended to seek professional assistance from a qualified technician.
2. Thermostat problems
If your air conditioner doesn’t turn on, problems with the thermostat could be the cause.
The thermostat is responsible for regulating the desired temperature in your home and controlling the HVAC system. Issues with calibration, programming, or a malfunctioning thermostat can prevent your air conditioner from starting up properly.
Solution:
1. Check the settings: Ensure that the thermostat is set to “Cool” mode and the desired temperature is lower than the current room temperature. Also, verify that the thermostat is not set to “Off” or “Fan Only” mode.
2. Adjust temperature differential: Some thermostats have a temperature differential setting. If available, ensure it is set to an appropriate level, usually 1-2 degrees.
3. Change batteries: If your thermostat uses batteries, replace them with fresh ones and ensure they are properly installed.
4. Calibrate the thermostat: If the thermostat is not displaying the correct temperature or is not accurately controlling the HVAC system, consult the manufacturer’s instructions to calibrate it properly.
5. Reset the thermostat: To reset the thermostat, turn off the power supply, either by switching off the circuit breaker or removing it from the wall mount, wait for a few minutes, and then restore power.
3. Faulty wiring
When your air conditioner fails to turn on, faulty wiring within the unit or in the electrical connections may be to blame. Damaged or loose wires can disrupt the electrical flow and prevent the air conditioner from operating correctly.
Identifying and addressing these wiring issues is crucial for restoring the functionality of your cooling system.
Solution:
1. Turn off the power: Before attempting any electrical work, ensure that the power supply to the air conditioner is turned off through the circuit breaker.
2. Inspect the wiring: Carefully examine the wires connecting the air conditioner components, including the thermostat, circuit board, and compressor. Look for any signs of damage, frayed or exposed wires, or loose connections.
3. Repair or replace damaged wires: If you discover damaged wires, repair them with electrical tape or wire connectors. If the damage is severe, consider replacing the affected wire with a suitable replacement.
4. Secure loose connections: Tighten any loose connections within the wiring, ensuring they are properly fastened and secure.

4. Clogged air filters
A common cause of air conditioners failing to turn on is clogged air filters. Over time, dust, dirt, and debris accumulate in the air filters, restricting airflow and inhibiting the unit’s performance.
Knowing how to maintain them can help prevent this issue and ensure efficient operation.
Solution:
1. Locate the air filters: Check the user manual or follow the manufacturer’s instructions to find the location of the air filters in your specific air conditioning unit.
2. Remove the filters: Depending on the type of filter, gently remove them from their housing. Disposable filters can be discarded, while reusable filters should be cleaned.
3. Clean or replace the filters: If your filters are reusable, rinse them with water or use a vacuum cleaner to remove dust and debris. Allow them to dry completely before reinstalling. For disposable filters, replace them with new ones of the appropriate size and type.
4. Install the filters correctly: Ensure that the filters are correctly installed, following the directional arrows or marks indicated on the filter and inside the unit.
5. Regular maintenance: To prevent future clogging, establish a regular maintenance schedule. Clean or replace the filters at least every three months or as recommended by the manufacturer.
5. Condensate drain line clogs
A clogged condensate drain line can lead to several issues, including air conditioners not turning on.
As the air conditioner cools the air, it generates condensation that needs to be drained properly. If the condensate drain line becomes clogged with dirt, debris, or biological growth, it can back up and trigger a safety mechanism that prevents the air conditioner from starting up.
Solution:
1. Locate the condensate drain line: Refer to the user manual or manufacturer’s instructions to find the condensate drain line in your air conditioning unit.
2. Inspect for clogs: Visually inspect the drain line for visible clogs or signs of blockage. Look for stagnant water or leaks near the unit.
3. Clear the clog: Use a wet/dry vacuum or a pipe cleaner to gently remove the clog from the drain line. Be careful not to damage the line during the process.
4. Flush with water: Once the clog is cleared, flush the condensate drain line with water to ensure it is fully unclogged. You can use a hose or pour water carefully into the line.
5. Regular maintenance: To prevent future clogs, incorporate regular maintenance by pouring a mixture of bleach and water into the drain line every few months. This helps prevent the growth of algae and mold.
6. Capacitor issues
The capacitor is an essential component that stores and releases electrical energy to start and run the motor of your air conditioner. If the capacitor is faulty or damaged, it can prevent the motor from starting, causing the air conditioner to remain inactive.
Identifying and fixing capacitor issues is crucial for restoring cooling system functionality.
Solution:
1. Turn off the power: Before working on the capacitor, turn off the power supply to the air conditioner at the circuit breaker.
2. Locate the capacitor: Consult the air conditioner’s manual or follow the manufacturer’s instructions to locate the capacitor within the unit.
3. Discharge the capacitor: Using an insulated screwdriver with a rubber handle, carefully short the terminals of the capacitor to discharge any stored electrical energy. Be cautious and follow safety guidelines while performing this step.
4. Test the capacitor: Use a multimeter set to capacitance mode to test the capacitance and voltage of the capacitor. Compare the readings with the manufacturer’s specifications to determine if the capacitor is faulty.
5. Replace the capacitor: If the capacitor fails the test, purchase a suitable replacement capacitor with identical specifications. Carefully disconnect the wires connected to the faulty capacitor and install the new one in its place.
6. Reconnect and test: Ensure all the connections are secure and correct. Restore power at the circuit breaker, set the thermostat to cool, and check if the air conditioner turns on and functions properly.
7. Blower motor problems
If your air conditioner isn’t turning on, blower motor problems might be the cause.
The blower motor is responsible for circulating the conditioned air in your home. Issues such as a faulty motor or a malfunctioning motor capacitor can prevent it from working properly.
Identifying and resolving blower motor problems is crucial for restoring the functionality of your cooling system.
Solution:
1. Turn off the power: Before inspecting or working on the blower motor, switch off the power supply at the circuit breaker.
2. Remove the access panel: Locate the access panel covering the blower motor and remove it. Refer to the manual or follow the manufacturer’s instructions if needed.
3. Inspect the motor and belt: Visually inspect the blower motor and the drive belt (if applicable) for signs of damage, such as burnt wires, excessive wear, or loose connections. Check the motor capacitor for swelling or leaking.
4. Test the motor: Using a multimeter, test the motor’s windings for continuity. If the motor fails this test, it may need to be replaced.
5. Replace the motor or capacitor: If the motor is damaged, consult the manufacturer’s guidelines for the correct replacement motor. If the motor capacitor is faulty, purchase a suitable replacement with identical specifications.
6. Reinstall and test: Install the new motor or capacitor, ensuring all connections are secure. Replace the access panel and restore power at the circuit breaker. Set the thermostat to cool, and check if the air conditioner turns on and the blower motor operates correctly.
8. Refrigerant leaks
A refrigerant leak can cause your air conditioner to stop working. Refrigerant is a substance that absorbs heat from the indoor air, cooling it down.
If there is a leak in the refrigerant lines, the air conditioner may not have enough refrigerant to function properly, resulting in inadequate cooling or the system not turning on at all.
Detecting and repairing refrigerant leaks is essential to restore your air conditioner’s performance.
Solution:
1. Turn off the power: Before working on the refrigerant lines, switch off the power supply to the air conditioner at the circuit breaker.
2. Locate the leak: Look for signs of oil stains or refrigerant residue around the refrigerant lines and connections. You may also use a leak detection kit or consult a professional to identify the exact location of the leak.
3. Repair or replace damaged components: Depending on the severity of the leak, you may need to repair or replace the damaged refrigerant lines, connections, or components. It is recommended to enlist the services of a qualified technician for complex repairs.
4. Pressure test and recharge: After the repairs, the technician will conduct a pressure test to ensure the system is sealed and holds the appropriate pressure. If the test is successful, they will recharge the air conditioner with the correct amount of refrigerant.
5. Test the system: Once the refrigerant has been recharged, switch on the power and test the air conditioner. Ensure that the unit is cooling effectively and the air conditioner is functioning correctly.
9. Faulty compressor
A faulty compressor can be a significant cause of air conditioners not turning on. The compressor is responsible for compressing the refrigerant and circulating it through the cooling system.
If the compressor is defective or damaged, the air conditioner may not start or cool properly.
Identifying and fixing compressor issues is crucial for restoring your cooling system’s functionality.
Solution:
1. Turn off the power: Before working on the compressor, switch off the power supply to the air conditioner at the circuit breaker.
2. Confirm the issue: Consult a professional technician to diagnose the compressor and verify if it is faulty. They may use specialized equipment or perform specific tests to determine the exact problem.
3. Repair or replace the compressor: If the compressor is found to be faulty, the technician will recommend either repairing or replacing it. The decision will depend on factors such as the extent of the damage, availability of spare parts, and cost-effectiveness.
4. System evaluation: In some cases, a faulty compressor may indicate other underlying issues within the system. The technician will evaluate the entire air conditioning system to ensure optimal performance and address any additional problems.
5. Professional assistance: Due to the complexity of compressor repairs, it is strongly advised to seek professional help. Certified HVAC technicians have the necessary knowledge, skills, and equipment to safely repair or replace the faulty compressor.
Preventative Measures
To minimize the chances of your air conditioner not turning on in the future, here are some preventative measures you can take:
- Regularly check and replace your air filters.
- Keep the area around your outdoor unit clear of debris and foliage.
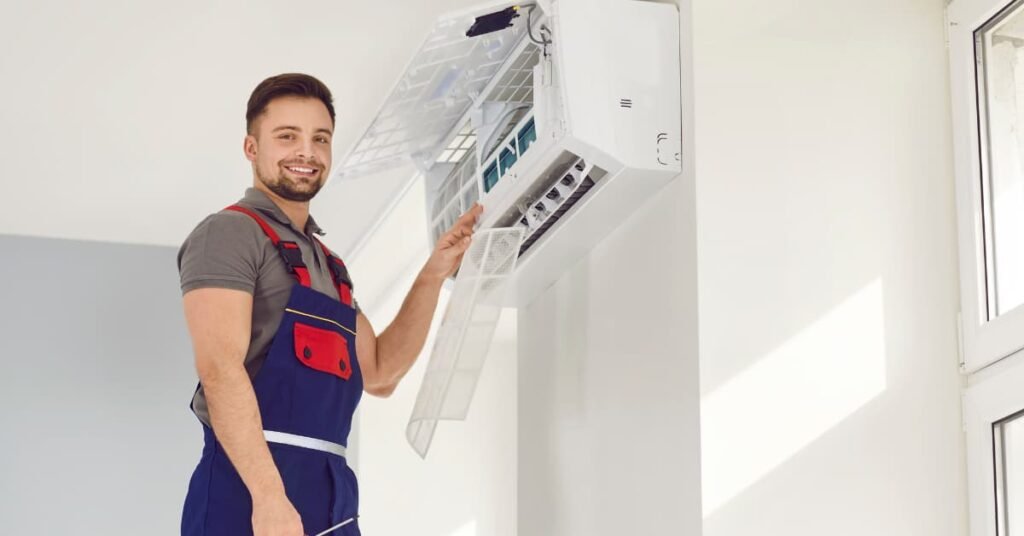
- Schedule annual maintenance checks with a certified HVAC technician.
- Consider a smart thermostat that can help detect and alert you to AC issues.
When to Call a Professional?
If you’ve tried the above solutions and your air conditioner still isn’t turning on, it might be time to call a certified HVAC technician.
Here are some scenarios where a professional’s help is key:
- Complex Electrical Issues: Any issues beyond basic troubleshooting should be checked by an expert.
- Refrigerant Handling: Only professionals should handle refrigerants due to health and environmental risks.
- Regular Maintenance: To prevent issues, have your AC serviced by a pro at least once a year.
Conclusion
Identifying the cause is crucial to restore functionality when air conditioners stop working due to various factors.
Whether it is a simple electrical issue or a more complex problem with the compressor or refrigerant lines, following the recommended solutions can help you troubleshoot and resolve most issues effectively.
However, always remember to prioritize safety and consult a professional if needed for more complex repairs. Regular maintenance and cleaning of your AC unit can also help prevent these issues from occurring.

